|
The Lost Crown
Introduction
The Lost Crown is the third of Jonathan
Boakes' supernatural adventures, but you need not have played either of his previous efforts
- Dark Fall: The Journal or Dark
Fall II: Lights Out in order to get into this one. It's a rather long adventure, best
played
with the lights turned out and the sound turned up...
Tips and conventions
Firstly, this guide is written in English
as practised in Ireland. So no, those are not spelling errors. It really is 'colourful' where
I live ;-)
Before doing anything else, you'll want to install the patch from version 1.0 to 1.1. It's
located at the bottom of the following page:
http://www.thelostcrown.co.uk/
When you run the thelostcrown-update1-1.exe file you downloaded, it automatically
puts the single file contained in the patch, understudy.dcp, into a folder underneath
where you installed The Lost Crown called: New Folder. If you just leave
things like that, the patch *will not have been applied*. So what you need to do is manually
copy that new understudy.dcp file over the top of the one in the folder where
The Lost Crown is actually installed. Note that the patched file is actually smaller,
at 295K, than the original file which weighs in at 380K.
Objects that can be acquired by Nigel will be marked in bold at the place where you obtain
them in inventory. Example: pick up the pencil. Be sure to examine every item that
comes into your inventory. For instance, a business card might have a phone number on the
back
that you wouldn't know about otherwise.
Be sure to talk to characters on all conversation topics that are presented, else you might
miss important clues. Likewise, examine *every* place in a scene that exhibits a magnifying
glass icon when you roll your cursor over it. This game is full of obscure 'triggers', and
if you haven't done everything it is possible to do, you may not be able to progress to the
next time frame in the game.
As with all adventure games, a lot of backtracking is required. Once you are sure that
you've
fully examined a particular location, you can double-click on the direction arrow
to make Nigel
move to the next location instantly instead of slowly trundling over there
as he's wont to
do.
Nigel keeps a notebook of important events that occur, and it's also a to do list. You
might
have a glance at it once in a while if you're not sure what your next objectives are.
Day One
The game starts off with your character, Nigel Danvers,
standing on a train platform at the end of the line with the 'Station Master', who turns
out
to be strangely frugal with the information he dispenses...
Speak to the Station Master on all available
topics, then move your cursor to the bottom of the screen and examine all the items in your
inventory. You don't learn much, but from those exercises you can surmise the following:
- You work as some sort of designer for a company called Hadden Industries. They
seem
to be conducting experiments to open a portal to another dimension.
- Mr. Hadden is
the CEO
of the company, and you were working with two other researchers nicknamed Mr. Crow
and Mr.
Hare.
- You downloaded some files concerning 'evidence', but your unauthorised
actions were
discovered and you had to leave the building via a fire escape. You then took
a train from
London to the first far-flung destination you could find, slept for most of
the journey, and
wound up in this godforsaken place called SedgeMarsh.
- A young lady boarded
the train in
London, and got off here too.
- If you examine your business card in inventory,
you find
your work phone number on the back.
Walk back along the platform, and examine the pictures on the wall. You learn that there
is
a nearby town called Saxton. Also have a closer look at the barrels on the cart there.
They
appear to be an ale delivery from a brewery or distributor who market Bishop's Whisper
and
Fenland Ale, destined for a place called 'The Bear'.
Walk back past the Station Master and head off the platform. Nigel refuses to walk into
the
fens, and turns around. Now when you walk back to the platform, the Station Master heads
down
to the ale barrels. When you speak to him next, you finally have a new conversation
choice:
"Where does the path lead?"
He reluctantly informs you that it leads to Saxton, and then mentions as an aside that,
since
you appear to be headed there, you might deliver something to the young lady who was
with you
on the train. Examining the item in inventory reveals that this mysterious young
lady dropped
her wallet, which contains a student ID card for one Lucy Reubans. We've
done all we
can do here, so now head down the path to Saxton...
You soon arrive at a T junction. Have a look at the
map
there, then head off to the right. There is a man standing in a blind with a pair of
binoculars,
observing a heron out on the water. If you try to speak to him you just get told
to shut it,
so walk behind him and continue straight on the path which dead ends on the North
Sea. You
can pick up part of a rusty sign here. Then backtrack, and hang a right before
you get
to the birdwatcher. Continue on past a large stone with a rune symbol carved on it,
go forward
again, and as Nigel rounds the next bend, he pauses and observes someone in the
reeds (it just
might be our mysterious Lucy), and Nigel comments that he'll catch up to her
later.
Backtrack again, and make a left at the rock with the runes on it. You can see the top
of a
Martello tower from here, so head for it, then around it onto the Saxton path.
Pick up the next part of a rusty sign
here.
Continuing along the path brings you to the entrance of a cave. If you examine the
bit of sign
hanging next to the entrance, it doesn't take much to figure out we have the
makings of a 'Beware
dangerous undercurrents & erosion' sign. Sure enough, if you continue
along the path and
pick up the third part of a rusty sign, you can then place the
three pieces you've gathered
so far onto the wall, and rotate the four pieces into place
by holding down the left mouse
button near each piece. Might as well ignore the dire warning
and head into the cave now, eh?
You bet!
Upon entering the cave, Nigel immediately walks over to look at a page from the Saxton
Times
which explains that the spring high tides and ensuing erosion have brought hordes of
treasure
seekers down on the normally sleepy town, in search of treasure the erosion may
have exposed.
Among the most valuable pieces being sought is the Lost Anglo-Saxon Crown.
Oh well, now we
can go home since we know what all the fuss is going to be about... or not
;-)
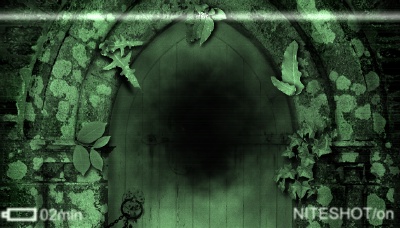
While you're here, note the carving of a sea monster on the wall. Now take the path just
to
the left of this carving, and read the newspaper page that's stuck in the iron gate that
blocks
your way. It would seem the spring tides are wreaking havoc with the local graveyard
as well.
If you click on the top of the gate, you get a close-up of beyond the gate, where
you can see
spectral forms scurrying to and fro. When you're finished there, go back and
head out the other
entrance of the cave.
You see a boy in the distance trying to fish his teddy bear out of the sea, but you can't
interact
with him yet. Continue onwards, and chat with the woman standing with her dog on
the beach.
Now it starts to get creepy. When you mention that your name is Nigel, she knows
that your
last name is Danvers. They've been expecting you! Come to think of it, it seems
the Station
Master knew who you were as well. And you could swear you never told him.
When you enquire about bed and board, the woman recommends The Bear. When you've finished
conversing
with her, head back to where you spotted the boy, and he's gone now - allowing
you access to
the path he was blocking with his tricycle. You come upon another cave entrance
here, but Nigel
refuses to proceed too far into the cave as he can't see anything. Exit the
cave, continue
up the beach, and you can now take some stairs up into the town.
At the top of the stairs, head left out along the harbour
wall, and read the plaque on the wall near the end of the pier. You note that the reconstruction
of the harbour wall in 1847 was made possible through the donations of a man named Frederick
Ager, from Northfield. Gee, that's really... not interesting. So head back to the stairs
and
now take the path to the right. Nigel spots a 'Missing Cat Watch' sign and takes note
of the
phone number for Cat Watch. Another few steps and now we've come to The Bear.
But let's
talk to the guy at the end of the alley first. All you learn is that he's a journalist
for
the local rag. Now go back to The Bear, and read the bill of fare next to the door. Closed
indefinitely!? Yet we can still enter...
Once inside The Bear, examine the fireplace and you'll
find a cat sitting on a chair in front of the fire. Go on, have a pet. Head through the doorway
marked Toilets, go down the hall, and note the grandfather clock that's stuck at 9:00.
Examine the folding partition, and take a Saxton Snappers leaflet. Speak to the woman
behind the bar about renting a room (you also get a bottle of water). She says the
hotel
is full, but offers you a cottage near the harbour (it's actually just past where the
journalist
is standing), hands you the Harbour Cottage keys, and a map of the
town (note:
the map comes in *really* handy from now on. Be sure to peruse it carefully at
the first opportunity,
in order to orient yourself). If you ask about a phone, you'll be
directed to a pay phone "across
the harbour, over the bridge and up Station Lane". Leave
once you've exhausted the myriad of
conversational opportunities presented here :- Oh well,
at least we have another place to
explore.
So head for the Harbour Cottage and... as you approach the cottage (once you have the keys)
an obnoxious man who turns out to be the Professor Hardacre you read about in the newspaper
article calls you over and gives you a right dressing down. Once that's over with, you can
enter the cottage.
What a dive! It looks like the place has been
deserted for countless years, and you'll soon discover... that it has. Pick up the phone.
It's
been disconnected. Then head down the hallway, and enter the kitchen. In a drawer to
the right,
you find some estate agent's papers. This was once the home of Eduardo Molina,
who arrived
here from Spain in the 1950's. Some tragedy occurred shortly thereafter, and
the place lay
abandoned for 30 years only to be put up for an auction (that never happened)
in 1988, and
that was presumably 20 years ago. There's also a boarded-up doorway at the end
of the room,
but Nigel observes that no one's been there for decades and makes nothing else
of it. When
you leave the kitchen and head for the sitting room again, you hear glass shattering.
Return
to the kitchen, and you'll see that a plate has fallen from the cabinet, exposing
a book.
Strangely, there are only two pages in what turns out to be Eduardo Molina's diary,
and they only elaborate a bit on what you already learned from the estate agent's papers.
Eduardo's
wife Christina arrived from Spain to join him in 1952, then promptly fell ill,
and most probably
died shortly thereafter. Go to the end of the hall next and examine the
wall there. Nigel comments:
"There's something about this wall... something not quite right."
Now head back through the
sitting room and go upstairs.
There's also not much you can do in the bedroom for the moment except examine the wardrobe.
Nigel decides it's a good spot to hide the artefacts he collected from Hadden Industries,
and
pins them up there. You can try to rest in the bed, but Nigel says he's not finished
investigating
yet. Hmm. Now this one had me puzzled for quite a while. As alluded to earlier,
the game is
full of 'triggers' and artificial blocking devices (no doubt you've noticed that
the way over
the bridge is currently blocked by some boats in the street, because Jonathan
doesn't want
you to go there yet. That was also the case with the boy and his tricycle, etc.)
So... what
haven't we done yet? Turns out that you need to examine the sink in the bathroom,
which results
in Nigel looking in the mirror and creeping himself out. Then the next time
you go upstairs,
Nigel hears a strange noise. Enter the bedroom, and you hear what sounds
like a cat trying
to escape from the chest at the base of the bed. But it's locked. Examine
the stag's head above
the bed, and hey presto, you obtain a small metal key. Now you
can open the chest, only
there's nothing there except a few sandbags. But... you have triggered
the end of Day One,
and Nigel can finally use the bed!
Night One
Nigel sleeps fitfully, and awakes to the sound
of
knocking. Head downstairs, and Nigel discovers a note from Morgan, the landlady at The
Bear.
Since there's no electricity (in most of the cottage), she's put some candles around
the place.
She also left you a Saxton Snappers leaflet (in case you didn't already
pick one up
in the back room of The Bear).
Enter the bathroom, turn on the light, and... an old clothes dummy has somehow appeared
in
the corner. Anyway, you still hear knocking, so go to the front door. When you go outside,
there's nobody at the door. But head to the right, and follow the person you spot out onto
the harbour wall. It's Professor Hardacre. He tries to persuade you to leave Saxton, but
of
course, Nigel's not having any of that. Question him, and all that you learn is that the
cottage
is apparently haunted, but you already figured that out.
After Hardacre leaves, head back towards the cottage, and as you pass The Bear, Nigel spots
something on the barrel there. It's a personal digital assistant. By accessing the device
menu,
you learn that the person it belongs to (Alex Spitmoor?) is following you. You can't
take the
device though. Now head into The Bear. As you approach the back room, Nigel hears
voices. But
when you go to investigate, no one is there. Exit The Bear, and head back towards
the cottage.
Speak to the man up on a ladder who is putting up buntings for May Day. Again,
you learn nothing
useful as a result of this conversation. Once you're done speaking to him,
take the path to
the right (there should be a cat sitting on a box there). Hey, now the boats
are no longer
blocking the path and you can explore the rest of the village. Nigel remarks
that you should
go find that phone and call Hadden.
Head over the bridge (you have to place your cursor quite far to the right of the bridge
to
get that option), then follow the coast path... and you bump into Lucy Reubans who is
putting
up her posters for May Day. Nigel returns her wallet, and the two of you don't exactly
hit
it off in the ensuing conversation. Enter the phone box there afterwards. Nigel finds
a press
pass tucked behind the phone. It's one of Alex Spitmoor's (the reporter for
the Saxton
Times, the guy who's been following you). On the back is Alex Spitmoor's phone
number.
To operate the phone, just use one of the cards from your inventory that has
the number you
want to call. Let's try your work phone number first, to call Hadden...
This is getting freaky. He knows where you are as well. But you learn some important things:
- You can 'scry' for ghosts by pouring water down a mirror. More on that shortly
- Hadden
has sent you a 'gift' in the post
Don't bother calling either Cat Watch or Alex Spitmoor yet, as it's not the right time
for
either. You also can't continue further down the coast path at this point in time...
but if
you wait by the phone box, a light will eventually come on in the window beside it.
You can
then look in the window where you spot a typewriter. Don't think that's significant
though.
Go back to the cottage now, turn on the light in the bathroom. Whoa. Examine the clothes
dummy if you
haven't already, then examine the mirror and use the bottle of water on it.
The face
of a beautiful woman comes into focus. I'm betting that's Molina's wife, Christina.
But she
doesn't respond to Nigel's questions, and the image eventually dissolves. Now look
in the bathtub,
and there's a lot of hair in it (note: you'll only be able to see the hair
if you applied the
version 1.1. patch. But this has no bearing on the game play anyway, as
you can't actually
do anything with the hair). Exit the bathroom and go to the end of the
hall. You can now see
the outline of a door under the wallpaper and panelling. Upon examining
it, Nigel comments:
"Urgh. The air smells rank, like rotten flesh." But you can't do anything
with the doorway
yet.
Examine the inverted cup on the table in the sitting room. Hmm. It seems we can conduct
a séance.
The cup moves in response to your questions, and seems to indicate there
is a spirit trapped
in the cottage, and that you can somehow help to set it free. Once you've
done that, you can
end Night One by accessing the bed upstairs. Nigel dreams of some weird
folk with scythes...
and that's that. Day Two
Head downstairs,
and Nigel finds
two items that have been shoved through the mail slot:
- A copy of the Saxton Times. Three more cats have gone missing
- An anonymous
letter
that says: "With blood on your hands you will come to me. With pain in your heart
you will
set them free."
Well... let's go outside now and mingle further with the locals. Go down the stairs and
walk
along the beach by the boats. A strange man by the name of Doctor Black is painting
a picture
of the harbour there. If you examine the painting, you'll see he's added a figure
there (near
the old net store, according to your map). He won't speak to you. Perhaps he
doesn't speak
English?
Now head back to town and speak to the landlady at The Bear. There are some new topics
available.
As usual, you don't learn much. Strangely, she won't even tell you what year it
is (I think
Nigel suspects that we may be in another time, or even another dimension. What
do you think?
;-)
Head to the antiques shop (use your map if you don't know where it is yet). There's a book
on display in the window with three crowns on the cover. Nigel comments: "Three crowns. A
link
to the legend." For some strange reason though, you can't enter the shop. So head down
the
alley and into the train station. There's a boy there taking photos of the pictures on
the
wall, but you can't talk to him (it turns out that he's the 'competition' for the annual
Saxton
Snappers contest) . You can, however, speak to the man behind the ticket counter.
In fact,
it's none other than our old friend, the Station Master! You learn of a horrible
train wreck
in the 20's that involved his father, and of how all the poor souls on the train
died that
night.
Pop into the Lighthouse pub next, for a spot of lunch. You'll note that every time Nigel
leaves
the pub, he's acquired a random food item. On to the museum next... but on the way
there you
bump into the old woman that was on the beach. She explains that the museum is
closed now,
because the curator, a Mr. Oogle, is not there at the moment. But he will be
in the afternoon.
Speak to her on all topics. She invites you around for tea later on, and
you learn that she
can identify certain items. Useful for later on no doubt...
Head down the coast path now, and you bump into Alex Spitmoor near the phone box. He's
quite
rude, and once again you don't learn anything. Continue on the coast path, and speak
to Bob
Tawny, the local smith. The first thing you learn from the conversation choices presented
is
that the old woman's name is Nanny Noah. Bob's busy right now, but he agrees to meet you
in
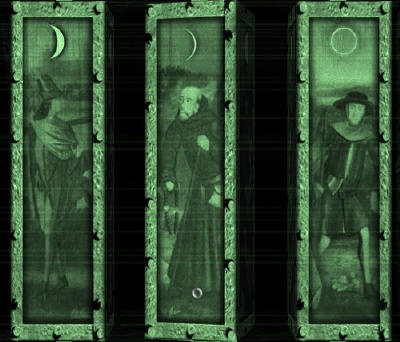
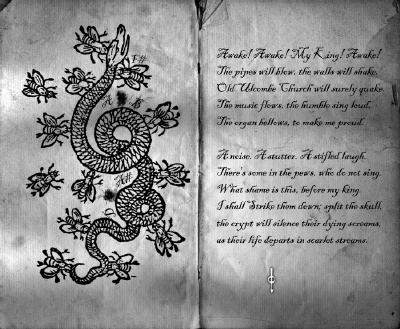
The Bear later. You also learn that Nanny Noah used to have children, but it sounds like
they
may have drowned :- That's probably their pictures on the wall, Rose and Cole. There's
a verse
tucked behind Cole's picture that you can read. You can also enter the door next
to the smithy,
and feed your Lighthouse leftovers to Cairan the pig (but this has no bearing
whatsoever on
the game play). According to our map, there are other places of interest further
along the
path. But it seems you can't go there yet. So head back to the cottage...
Behind the drain pipe next to the cottage door you find a note from Lucy. She was a bit
short
with you last night, but she's come around now. In fact, she's sitting on a bench right
next
to the cottage. You learn that Hardacre is in the caverns behind the beach. After speaking
with Lucy, head for the caverns.
Sure enough, Hardacre has set up shop there, and provided you with some light. You can
walk
past the professor and go a little further into the caverns, but you'll need your own
light
source to get further than that. As you go to leave the caverns, Hardacre informs you
that
your 'gift' from Hadden has arrived at the station. So let's go there to collect it
then, shall
we? Once you have the package in hand and return to the cottage, Nigel
places it on
the sitting room table and you can open it. Note the date on the package: April
1978! That's
30 years ago. A clue that all may not be as it seems to be...
Inside are a bunch of ghost hunting devices, and a note from Hadden. Once you've got all
the
gear out of the box and on the table, read the manual (it's tucked under the 'Environmeter').
Hmm. Some high tech ghost hunting gear it is indeed. Now we just need to figure out where
(and
when) we can use it. You've also acquired four other pieces of gear in your inventory:
- A camcorder, with 'night vision'
- A digital camera with motion
sensor
- An analogue dictaphone, voice activated
- An electronic EMF meter
Hmm. We need to find a place to try out these shiny, new gadgets. Hey, how about the cave
on
the path to Saxton where we saw the ghostly figures beyond the gate? Sure enough, the
digital
camera, dictaphone, and EMF meter all produce results when used on the top of the
gate. You
wind up with a photo of a cavern ghost, and a recording of cavern voices.
You
can also go back to the fens and get a photo of a frog, though I'd surmise that
has
more to do with the Saxton Snappers competition than our ghost hunting efforts.
Now head back to the cottage. You can take a photo of the covered doorway at the
end
of the hall. In the sitting room, you'll note that you can also interact with the armchair.
Indeed, you can take an armchair photo, and also get an armchair voice recording.
Finally, go to the bathroom, focus on the mirror, and get a nice photo of Christina...
and also a photo of the bathtub. On the way back upstairs, take note of the windmill
carving on the baluster at the base of the stairs. Now if you go upstairs and examine the
table,
Nigel will deposit all the evidence you have gathered so far in either the photo album,
or
the bin of tapes.
OK then... now I think we're ready for a ghost-busting extravaganza. Well, at least as
much
as we can muster for mid-day! Go to the caverns, and head past Professor Hardacre. Remember
that we couldn't go any further into the caverns because we didn't have a light source? Aha,
but now we have a camcorder with 'night vision' ;-) So point that sucker at the dark place,
then head forward until you can look to the left and see some wood. Examine the pieces of
wood
there, and pick up a plank of wood. Then back out of that scene, and head forward
again
until you come to a fork. Take the left-hand opening first, and advance towards the
shaft of
light until you get to spook city. You can have a one way conversation here. Then
there's a
recording opportunity, whereby you obtain a recording from the tidal chamber,
and a
photo from the tidal chamber.
Now backtrack and take the right-hand opening of the fork. There's an abyss here, but if
you
move to the left-hand side of it and look across (you see a rockfall blocking a passage),
you
can use the plank of wood here to cross the chasm. Once over the chasm, the rockfall
blocks
your way. Turn around to get the plank of wood again, and use it to dislodge the rocks.
Oops,
it broke. Oh well, I suppose we're truly committed now :- Advance into the next cave
until
you come to an extinguished campfire. When you use the EMF meter on it, the numbers
2513
are traced out. How odd. But... there's a chest just to the left of the campfire
that you can
use this combination to open. And then you get access to the ship's log of Captain
Walter Spivey.
He was searching for the Lost Crown too, which he apparently did not find.
But nonetheless,
he found a lot of treasure alright, and was looking to offload it at Gruel's
antiquities shop.
Hey, that was the name on the rotating sign at the antiques shop in Saxton,
was it not? Anyway,
as you finish reading the log and withdraw from the chest, an old boating
oar conveniently
drops out of the ceiling. Pick it up, and go back to the chasm. If you
examine the top of the
stalactite there, you'll see a hook in the ceiling. Use the boating
oar on the hook, then return
to the real world :-)
So now you can finally enter the antiques shop in town. Once inside Nigel comments "Now,
let's
try to find a link to Spivey, the smuggler." If you work your way to the back of the
shop,
you'll eventually encounter a man playing with a doll. In fact, he's so pre-occupied
with the
doll that he doesn't notice when you nick the book with three crowns on the cover
from
right under his nose. You can try speaking to him, but it's a futile exercise. He speaks
through
the doll and all you can make out it is "I'm Jemima." So exit the shop then and examine
the
book. Darn, the thing is locked! Hmm. I wonder who would have the key, or know how to
open
it? Wait... Bob Tawny is a smith, right? So take the book to him and he says he'll open
it
for you in the afternoon. As you leave the smithy, a cat walks past and goes down the
coast
path (the part that you couldn't visit yet). Nigel follows it and arrives at the Celtic
Corner.
The new ager behind the counter is Rhys, the guy that runs the Saxton Snappers competition.
Indeed you can deposit your photo of a frog in the box at the rear of the shop. Then speak
to Rhys. After speaking to him, be sure to peruse the bookshelf near the shop entrance. The
most interesting read is volume 3 of Unknown Anglia. It tells the tale of a ghost
ship,
the failed invasion from whence it came, and it involves the infamous Walter Spivey.
At the
very end you get a good summation of the Three Lost Crowns legend.
The middle books on the shelf contain a catalogue of Anglo-Saxon symbols, along with an
explanation
of how they can be rotated to mean different things concerning the objects depicted.
Worth
taking note of. I have the feeling we might need to do some symbol translations later
on.
When you're done with the bookshelf, exit the Celtic Corner. Outside the shop in some boxes,
there are two interesting books you can look at. One is basically Everything You Always
Wanted to Know About Yew Trees But Were Afraid to Ask. The other is a thinly (though
one
might also say cleverly) disguised advert for the Dark Fall and Barrow Hill
games.
Now you can continue further down the coast path. Go out to the Old Lighthouse and have
a look
at the North Sea. This triggers another event. The bell in the tower above the museum
(which
you dreamed of the fist night) rings, and I think that just might be the signal that
the museum
is now open for business. You can go one scene further along the path to where
a stream runs
under the path, but there's nothing you can do here for the moment. So turn
around and head
back to town. On the way there, be sure to pop in to Bob Tawny. He presents
you with the now
unlocked book with three crowns on the cover. You can't examine it
here though. So exit
the smithy and Nigel automatically heads back to the cottage...
The book turns out to be William Ager's Journal. You must examine all four clues
on
the inside cover before Nigel will turn the pages. Note the address: Ager House, Raven
Lane,
Northfield. Anyway, the inside of the book contains only two pages containing some
verses about
a girl named Emily. From the wording of the first verses, Nigel gleans that
he may have lived
alongside the railway somewhere. Time for another visit to SedgeMarsh Station,
methinks...
Sure enough, you can now walk down along
the
tracks by the 'Beware of the Trains' sign. You soon come to a signal that is behaving
strangely
indeed. You can take a photo of the railway signal. Then continue onwards
and you arrive
at a place where a small footbridge leaves the tracks. Examine the woods there
to get Nigel
off the tracks, and now you can continue down the path to the west to arrive
at... Raven Lane!
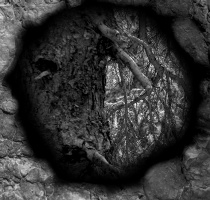
There are three paths here, but Nigel won't take
the
right-most one, so take the middle path. You come upon a strange monolith with symbols
on it.
The monolith can be rotated, giving you a different view each time through the hole
at the
top. My guess is that each of the symbols refers to a season, but aside from winter
it's hard
to make out what the other seasons might be. Since this monolith has three dots
above each
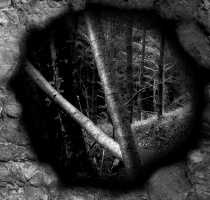
symbol, for reference we'll call this Monolith #3. Following are pictures of each
season, along
with the corresponding symbol for the season:
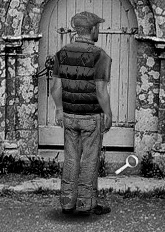
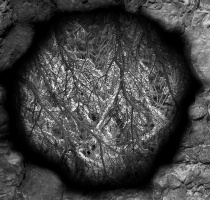 |  | | Monolith #3, Season #1 |
|
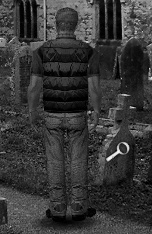
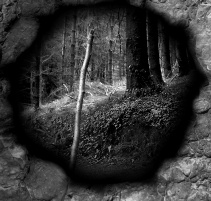 |  | | Monolith #3, Season #2 |
|
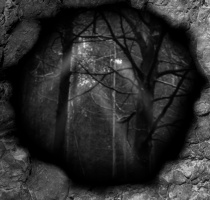 |  | | Monolith #3, Season #3 |
|
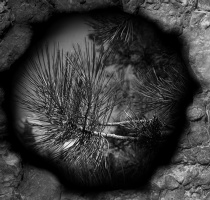 |  | | Monolith #3, Season #4 |
|
Once you're done examining Monolith #3, take the path west of the monolith, then go left
at
the fork, and you arrive at Monolith #2. The winter scene looks the same here, but the
others
are different:
| | | | Monolith #2, Season #1 |
|
 | | | Monolith #2, Season #2 |
|
 | | | Monolith #2, Season #3 |
|
 | | | Monolith #2, Season #4 |
|
When you're done with that one, continue west and you come to Monolith #1. But the wooden
posts
are missing from this one, so it can't be rotated. Let's leave the monoliths for a
while. Head
south now, and you emerge from the dark woods. Nigel spots an envelope on top
of a fence post
here. It's an ominous letter from a man who seems to be threatening his unrequited
lover's
husband, signed 'BG'. Continue west on this path, and you come to what must be...
Go west, then north, and you enter the garden where
you can speak to Katherine Karswell. You get invited to lunch, but the downside is that you
have to help prepare it. As you go to enter the house to find the kitchen, note the symbol
on the outside wall that's the same as one of the symbols on the monoliths:
When you examine the symbol, Nigel comments "It's been washed smooth, by heavy spring rain."
So that means the symbol above represents the spring season. Once inside, you'd of
course
love to head up the stairs, but Nigel's not having it. Instead, get a close-up of
the stove
in the kitchen. Note another one of the symbols on the wall next to the stove:
|
Upon examining it, Nigel comments "The patterned stone is heavily cracked, probably frost
damage."
Yes, our initial guess was correct - the symbol above does correspond to winter.
Open
the Karswell Cook Book (on the left side of this close-up), and you are presented with
the
menu du jour: Seven Birds Stew. Read the note under the book, and you learn that
winter
was the first season in the Dark Ages, not the last. This will be an important fact
to remember
for later on! Now go back outside, and head to the right. You come upon Robert
in his workshop.
He's very intent on something and also agitated, so you won't be able to
engage him in conversation
just yet.
Return to the garden and speak to Katherine again, choosing the "About those ingredients?"
conversation option. Katherine will do the meaty parts, so it's your chore to collect the
veggie
bits of the recipe. You need to gather:
- Cobnuts. These can be found next to the railroad tracks
- Garlic.
This is right next to the cobnuts, so get them both in one go
- Wood mushrooms.
You
should remember that these are near Monolith #3
- Chives. Go behind the house,
and
all the way to the end of the lane near the horse
Once you've collected those, return to the kitchen, where Katherine has now set up shop.
You
can't add the ingredients directly to the stew, they have to be prepared first. So locate
the
cutting board and mortar and pestle on the kitchen table. The cobnuts get ground up,
and the
other ingredients get the chopped treatment. Then you can add all that to the stew.
But we
need one final ingredient, something to calm Robert down. Katherine sends you upstairs
to look
at a picture of some hedgerow balm. Upon examining the picture, Nigel remembers seeing
some
in the hedgerow on the lane in front of the house. But while you're there in the bedroom,
examine
the third symbol, that looks like this:
|
Nigel comments that "The pattern has been bleached by the summer sun." Well, that pretty
much
confirms our suspicion that this symbol must represent the summer season. Now
go back
outside and collect the hedgerow balm from the centre of the hedgerow on the
lane. You
can add this directly to the pot without chopping it first (it's taking the place
of the bay
leaves in the original recipe). Now Katherine prepares the stew while you put
your feet up.
Several hours later... having consumed the stew, Katherine has fallen asleep
in the kitchen.
Time to pay another visit to Robert's workshop then, now that he's presumably
calmed down.
Indeed he has. Now you can speak to him, then carefully examine his work table. You must
read
all four scrolls (one of them is a map of the woods), then pick up the bundle of sturdy
oak sticks (if you haven't read all the scrolls, you won't know what to do with the oak
sticks).
Now head back to Monolith #1. Use the oak sticks on it, then rotate the monolith till you
get
to the winter symbol. When you gaze through the hole at the top, you'll now see another
monolith.
I think we're finally getting somewhere ;-) Go to Monolith #2 and rotate it to
the spring symbol,
then to Monolith #3 and rotate it to the summer symbol. Now when you return
to Monolith #1
and look through it... bingo, you see the tower of Northfield Church! Nigel
marks the church
location on his map, and now you can go there (of course, it's on the path
through the woods
that Nigel wouldn't take previously).
Nigel comments that it would be most fruitful
to come ghost hunting here at night, but we can also accomplish some things during the day
as it turns out. So head to the left of the church and you discover the grave of William
Ager.
Note the three crowns on his headstone. Continue heading left, and enter the church
through
the iron door. You can read the notices on the bulletin board. I didn't find much
of interest
there, except that we should look for a Mr. Russet somewhere in the grounds,
and that the vicar
can be found in the vestry during daytime hours.
When you enter the church proper, you'll see a small table just inside the door. You can
place
your camera on this table (it's motion sensing, remember). Behind this table is a bookshelf,
where you can read how the Black Death decimated this part of Anglia in 1348. Then work your
way into the church until you come to a partitioned-off area. Examine the partition, and
you
get a close-up of some records with names of the former rectors and vicars that are interred
here. You can obtain a rood screen voice recording here. Then use your camcorder on
the names, and you acquire a new clue: the name Thomas Ager stands out among the rest.
Then enter the partitioned-off area (which turns out to be the church's sanctuary). Among
other
things, it contains a tomb with a statue on it. You can get a Sanctuary voice recording
off the large wall plaque above the tomb. The voice in it quite clearly says: "Ager, Ager...
he took my hands." Yikes! Examine the statue next, and Nigel notes that it indeed has no
hands.
Pull out of the close-up and use your camcorder on the statue. Nigel spots some 'orb
activity'.
Perhaps this place will be even better to visit at night though? Also have a look
at the row
of small plaques on the shelf there. If you examine the first one carefully, Nigel
notes that
there is another church that he doesn't recognise depicted on the top left-hand
side of the
plaque. Now head southwest to move further away from the tomb, and you can get
a close-up of
the base of the tomb. The panels there probably used to have ornate carvings
in them, but they
have somehow been worn smooth. There's also another coat of arms carved
into a pew here.
Continue on to the choir stalls. From here you can interact with the pews in the centre
of
the church. You can use the camcorder to see a ghost walking about. He even passes right
in
front of you if you wait long enough. And oh is that ghost ugly! You can also get a recording
from the church pews here. Then make a left into the vestry to meet the vicar. Before
speaking
to him, examine the tapestry with three crowns to his right. Also check out the
portrait high
up the wall with your camcorder. Nigel feels there's something about the eyes.
Speak to the
vicar now. He's lost something that he wants you to find for him. But he doesn't
know what
it is, or where he last had it... though he thinks he lost it sometime between
Wednesday and
Friday. Hmm. We'll have to keep our eyes peeled for anything that might belong
to the vicar.
Wait, I know... exit the church and examine the notice on the bulletin board
concerning the
memorial service for Evelyn Ackland. The vicar somehow managed to lose next
Thursday! You've
now acquired a memorial service notice in inventory. Go speak to
him again, and he wants
you to take the notice to Nanny Noah, so she can organise flowers
for the service. You can
learn a little more by speaking further with the vicar. Thomas Ager,
a former rector, came
into a lot of wealth (by mysterious means) shortly before he died.
His descendant, the ubiquitous
William Ager, was thought to have taken an important secret
to the grave. We're betting it's
the secret of where the Lost Crown is buried, eh?
Sometime during the course of these investigations you hear the camera you placed on the
table
trigger in the distance. Go back to it, and collect a photo of a church ghost.
OK, I
think we're finished with our investigation of the church interior for the moment.
Exit the church, head around the back, and into the North Yard. There's a man digging a
grave
there (our Mr. Russet, no doubt). He doesn't have time to speak with you now, but if
you agree
to perform a task for him, then he'll have time. Hmm. the crows have scattered
the name of
poor 'Tom' all over the graveyard, and you need to gather up the pieces and put
them back together
again. So here we go... head south from the North Yard. In the next scene:
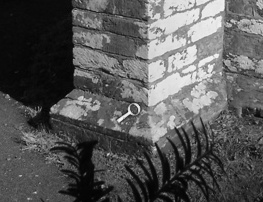 | | Here
you find an 'm' |
You find the letter 'm'. If you head past that spot, you'll find the headstone that
you need to put the letters back into. Might as well deposit the 'm' there now. Continue
southwest,
around another corner of the church, then head north towards a wooden door with
a drainpipe
next to it. Examine the drainpipe:
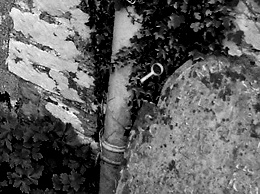 | | Letter
'T' here |
And now you have a letter 'T'. Continue around to the front of the church, and you
find
a door that is rusted shut. Examine the base of the door:
 | | The
letter 'O'... and a book |
And now you have a letter 'O', and you've also found a second three crowns book!
Head southeast from there, and you find:
 | | Here
is the letter 'n' |
The letter 'n', tucked into the cross. The letter 'e', can be found at the
base
of the door where you entered the church:
 | | And
the letter 'e' |
The final letter 'h' is under some pieces of skull in the bucket right next to the
gravedigger
;-) Now you can go back to Tom's headstone and place the remaining pieces on
it to complete
the puzzle. And while you're there, you might as well have a look at the second
three crowns
book that you just found. Hmm. It's Thomas Ager's Journal, and there's
an intriguing
verse inside. It concerns a man named Gurney, and about how his hands were
apparently taken
from him and buried somewhere...
You can now talk to the gravedigger. As usual, be sure to exhaust all topics. You do learn
some important things. The man in the tomb in the church, with the missing hands, is named
Nick Gurney (I suspect we need to find out exactly how and why Gurney lost his hands). The
gravedigger suggests you can learn more about the Ager family in the Saxton museum, or from
Nanny Noah. And finally, he agrees to leave the place open tonight to accommodate your ghost-hunting
endeavours. We can return to Saxton now. Be sure to look through the bird watchers blind
on
the way over the fens. You can get a very good photo of a heron now ;-)
Before we do anything else, let's lighten our
inventory
a bit by getting rid of some of this junk we've been collecting. So go to the Celtic
Corner
and deposit the photo of a heron in the competition box. Then return to the cottage,
head up
the stairs and look at the ceiling there. You get another photo opportunity. This
time you
capture a photo of the cottage skylight. Access the table in the bedroom
to add all
the paranormal stuff you acquired today to your mounting evidence collection.
Now head for
the museum.
At the museum entrance, examine the counter
to obtain
a map of the exhibits. Speak to the curator, Professor Oogle. Hmm. I guess
we won't
be coming back here later to ghost hunt... unless we can find a way to sneak in.
Anyway, let's
go in, shall we? The area numbers and letters below correspond to those on
your map.
Be sure to read the plaque containing some interesting facts about the museum, and visit
the
web site referenced at the bottom of the plaque: www.saxtonmuseum.co.uk.
Jonathan Boakes has a real surprise in store for you there, as he's created a spoof site
that
ties in very nicely with the game ;-) Examine the woman's portrait, and then in the
ensuing
close-up examine the grating with a fan behind it. Hey, looks like there's a hidden
room back
there. Examine the rotating statue to glean some info about the Anglo-Saxon kings.
Nothing
more to see here, so head west into...
Only a picture of Northfield in 1602 here. Move northeast to Area 2.
You can get a voice recording of the Saxton Skeleton, but someone is watching you
through
the CCTV, and you'll not be able to use the camera or the camcorder :- Examine the
posters
and exhibits. Well, it is a mystery. The man to whom the skeleton belongs was apparently
murdered
a few decades ago, in the time of William Ager. The hat and scythe on exhibit look
kind of
familiar, don't they? Nigel takes note of the Crime Line phone number. When
you're done
here, head west to...
Actually, it's behind you. Read about Saxton's famous purported treasure, and... you can
take
a photo of the Saxton area map because there is no surveillance camera in range
here
;-) Hmm. I see one new location on the map, a war memorial past the lighthouse. Move
west again
to Area 3 next.
Here you learn that an Emily Travers perished in the caverns. Only her shattered eyeglasses
were ever found. You also learn that Eduardo Molina committed suicide (no doubt due to the
tragic death of his wife, Christina). When finished here, move northeast to Area 5.
Nothing to see here, so move into Area 4 (the library).
Fortunately, there are only two books that you can read here. The first one (book with bluish
cover) is entitled Olden families of Anglia. It documents the Russets (our gravedigger's
family), the Agers, and the Gurneys. You don't learn much about these families that you haven't
either learned or surmised already, but now we start to hear more about Ulcombe, a town beyond
Saxton. The other book of interest here, with the green cover, is a duplicate of the one
we
came upon in the Celtic Corner - a catalogue of Anglo-Saxon symbols. When finished in
the library,
exit, and move northwest to Areas 6, D, and E (the butterfly room).
The door to the room you saw through the fan grating is here, but it's locked. When Nigel
knocks
on the door though, you can hear something bumping around inside. Might as well have
a look
at the butterflies, Spivey's scope, the battle helmet, and also the hand activated
video recording.
It shows footage of Northfield Church, and also what can only be Ulcombe
Church (overlooking
the North Sea). From here, you can go northwest to pop into the video
room and watch some of
Jonathan Boakes' home movies of Saxton... but you won't learn anything
from that, so head west
to Area 7 instead.
You can obtain an eerie recording of the museum's noose exhibit here, whereby you
can
delight to the sounds of Molina hanging himself. No other exhibits of interest here,
so move
northeast towards the suit of armour next.
You can press the button here to summons the lift. Once on board, just for curiosity's sake,
press 0 first to go to the basement. But it doesn't look like you can do anything useful
here,
so get back in the lift and press 2 next.
The second floor is primarily an art gallery. At the very end of the hall, you can capture
some strange sounds recorded from the painting, 'Tree of Crows'. There's another hand-activated
video there which largely seems to deal with aspects of the occult. But exactly what it's
trying
to depict I cannot tell. As you pull away from these final exhibits, you get a message
over
the tannoy that the museum will be closing in 10 minutes. I guess we've seen all we're
meant
to see then, so head for the exit (I tried heading for the basement after the announcement,
to see if I could wait the 10 minutes out and get locked in for the night, but this doesn't
seem possible). On the way back down the alley towards town, you hear George barking. You
can
go left into Nanny Noah's house now.
Try to speak to Nanny Noah, but this just
prompts
her to make tea. Once you and Nanny are seated, speak to her on all topics. She gives
you a
charm when you mention that you are going to visit the church again this night.
Present
her with the memorial service notice then (you have a dialogue option to show her
items). After
that, she reads your palm. Then the moon rises and Nigel returns to the cottage.
Access the
bed to get a few hours kip before setting out for the night's ghost-hunting. Nigel
discovers
a set of shears under the covers. Has someone been here?
Night Two
I suppose we can do some more hunting in the cottage,
prior to setting out for Carrion Wood. As you head downstairs, Nigel hears a rattling sound.
Investigation reveals it's the bathroom door. Nigel won't enter until he knows who, or what,
is in there. You can look through the keyhole, only to see a dark shape pass right before
your
eyes! Now Nigel will let you open the door and head inside... as you turn on the light,
you
notice that the clothes dummy has reappeared in the corner. And there's something in
the sink.
But when you go to investigate, the light suddenly goes out. You hear strange noises,
then
the light comes on again, but whatever was in the sink has disappeared :- You can take
a photo
of the mirror, but this time you just get a ghostly image of Nigel.
Use the camcorder to so you can see the dark
part
of the room. You can zoom in on a picture of a train, and see ghostly figures on the
platform.
Then take a photo of the same area to obtain a photo of the station staff.
Ghostly images
appear among the people in the photo. You can also get a bizarre recording,
from the station
staff photo. Well, that's all for here. Go back to the cottage to deposit
your latest evidence,
then head for The Bear.
Now that's a bit scary for starters. Bob Tawny is
standing
behind the bar in place of the landlady! Speak to him, and you of course learn nothing,
but
he does present you with a book, The Legend of Grindle and Ganwulf. It's
dedicated
to Bob, and signed by Rose Noah, dated 1958. Hey, a picture of Rose was hanging
in Bob's smithy,
right? Putting two and two together, I think we can safely conclude that
the Rose in the picture
hanging on the wall in the smithy is not one of Nanny Noah's daughters,
but in fact none other
than Nanny Noah herself! Anyway, have a read of the book. Whoa. Looks
like that crown is going
to be mighty hard to come by :-
OK, I suppose we can head for Northfield Church now... on the way there, when you reach
the
faulty junction signal, Nigel is attacked by spirits from an oozing, black cloud. Use
the charm
Nanny Noah gave you to deflect the spirits as they emerge from the cloud. Once
you've done
this successfully a number of times, the cloud will dissipate and you may continue
onwards.
Make your way off the tracks and to the church.
Once you reach the churchyard, you'll need
to
use the camcorder to see. It's quite difficult to navigate through the tombstones, but
try
to keep heading for the outline of the church, then work your way around it, and eventually
you'll find that Russet has indeed left the door open for you.
Once inside, examine the small table near the door. Read the note that Russet has left
under
the Hedge Witch Tome there, and then read the tome. Hmm. Looks like you need
to construct
a pentagram with special varieties of leaves around one of these wraiths in
order to vanquish
it. But where are we to find these leaves? Well... we need to go back outside
and hunt around
in the churchyard for them ;-) First, a handy tip: if you're navigating around
using my instructions
below, then be sure to save the game right after you pick each leaf
variety; otherwise, you
may get lost without a point of reference to restore to!
So... immediately upon leaving the church, turn right, and we encounter the third leaf
variety
from the tome diagram:
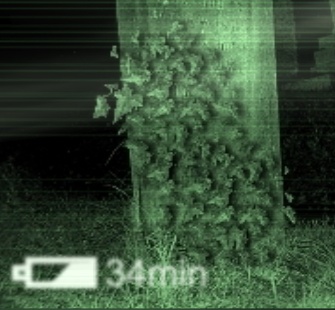 |
| Leaf variety #3 - Creeping Ivy |
Pick some Creeping Ivy. Now go left, move forward, go left, move forward, and then
turn
right twice and pick some Binding Nightshade from the wall at the back corner
of the
church:
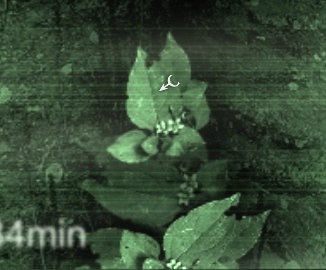 |
| Leaf variety #1 - Binding Nightshade |
Now if you turn right, go forward, turn right, go forward, and turn right once more, you'll
be able to pick some Preachers Fear: 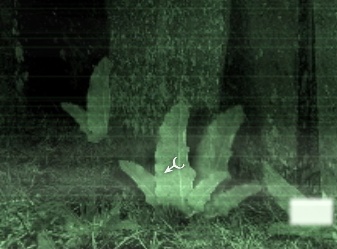 | | Leaf variety #2 - Preachers
Fear |
From here... turn left, move forward, then turn left again, and you can pick some Ash
Thorn:
 |
| Leaf variety #5 - Ash Thorn |
Finally, turn right, move forward, turn right, move forward, then turn left to find some
Wychs
Bane:
 |
| Leaf variety #4 - Wychs Bane |
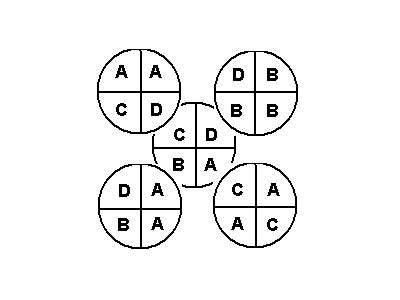
OK, we're done collecting! Now go to the wooden front door of the church, and examine it
so
you get a close-up you can interact with. You must place the leaves you've gathered in
the
positions shown below, and this will cause the wraith to disperse:
 |
| Correct placement of the leaves |
Now we can go back inside the church and resume our ghost hunting (before you dispersed
the
wraith, your path through the church interior was blocked in all directions). But before
we
do that... head behind the church once again, and examine the rubbish heap near the drainpipe.
The wraith was preventing you from doing this earlier, but now you can pick up a pair
of
stony, cold hands. Gurney's, of course!
Ok, into the church again. Near Gurney's tomb, on the end of a pew, you can take a photo
of a coat of arms from the pew. Also, examine the stone slate above Gurney's tomb, and
you can also take a photo of a coat of arms from stone slate. On the archway above
the
sanctuary entrance, you can get a photo of archway coat of arms. Now use the camcorder
on Gurney's tomb. Whoa! Gurney is saying: "He took my hands, they took my arms." Aha. It
must
be *coats of* arms Gurney is referring to! Next, you can get a close-up of the statue,
then
replace Gurney's hands. Finally, get a close-up of the base of the statue, and place
the three
coat of arms photos you just took on their corresponding places. Now when you use
the camcorder
on Gurney's statue once more, he's singing a different tune: "With oil and
hair I captured
the crows. Seek the tree." As Nigel mulls this over, he mentions a painting.
Yes! Gurney must
be referring to the painting of the crows in the museum's gallery ;-) Nigel
heads back to town
now. Hmm. It appears from reading Nigel's latest notes that there must
be a way to break into
the museum. So head for there.
Next to Nanny Noah's front door you'll find
a garden
spade. Use it to prise open the lit window on the side of the museum, and
we're in. Head
for the washroom first. In a bin there, you find a newspaper. Hmm.
The Karswells you
visited at Ager House earlier have actually been dead for 20 years! But
how could that be?
Use the camera on the washroom mirror to get a photo of a washroom ghost. Then use
the
camcorder on the mirror. You can have a conversation, of sorts, with this ghost: "Is
there anyone here?" Two taps. Yes.
"Am I alone in this place?" One tap. No.
"Can
you
see me?" Two taps. Yes.
"Can you hear me?" (stupid question, but) Two taps. Yes
The ghost flickers into view for a few seconds, then:
"Are you trapped in this place?" Strangely... one tap. No.
"Throw something, hit something,
make a noise." (sound of ghost throwing or hitting something. A bottle maybe?)
"Make
something
move, please." (noise of something moving, but I couldn't discern what)
Shortly after that, the event passes. Exit the washroom, and head south from here, then
west
around a corner and you come to a photo copier. Hey, kooks like that ghost is making
copies
of herself! Then enter the CCTV monitoring room next to the copier. Examine the main
monitor.
The fourth button down on the left shows you a view of the admissions desk, where
you eventually
get a close-up of the number 4581. Has to be a combination. On this,
and some of the
other monitors, you're watching Nigel's progress through the museum (opening
the scythe exhibit
case, handling the skeleton), even though you haven't even been there
yet. Are these clues,
or a small continuity problem, Jonathan? ;-)
Now exit the monitor room, head back past the washroom, and northwest to the lift. Oops.
The
lift isn't operational. Hmm. Maybe we've blown a fuse somewhere. Head back to the monitor
room,
and access the panel on the right-hand wall. The combination is, of course, 4581. Yup,
it's
a blown fuse. Remove it, and now we need to go find a replacement. Head back to the
storeroom
where you first entered, and you'll be able to take a fuse from the box
of them on the
shelf there, near the window. Now go back to the monitor room, replace the
fuse, et voil,
you can see from the monitor that power has been restored to the lift.
So take it up to the
first floor then...
You can get a photo of Molina's noose now. Next, have a look through the fan vent
into
the hidden room. Nigel hears someone there. It's Lucy, ostensibly searching for cats!
After
a bit of a chat, Lucy reluctantly agrees to join forces with Nigel, and he hands her
the EMF
meter. But Lucy seems content to stay on her own for the time being.
So... head for the hidden room first. Move the painting on the floor, and it reveals a
floor
plan of the old net store. Nigel wonders what Lucy was really doing in here. More interestingly,
the filing cabinet on the left-hand side of the room will slide over to reveal a hidden passage!
Before you enter though, head back out and speak to Lucy. You ask if she has a mobile phone,
because that will affect the reliability of the EMF meter. She assures you that she doesn't
have one.
OK then... enter the passage, then head around to the left. In a box on the floor there
you
discover some newspaper clippings that tell of how a young girl named Verity Church became
trapped in this very building and died. Indeed, as you pull out of the close-up, Verity's
ghost
appears behind you. Of course, that's the ghost you saw earlier in the basement. There
are
also some peepholes in the wall here. You can observe a ghostly figure walking by one
of them.
On the other side of the passage is another room with peepholes. Also, you can examine
a set
of pipes in the corner. Nigel observes "They must lead... somewhere." As you go to
exit the
passage, Nigel hears a mobile phone ring. Peering through one of the peepholes,
you can see
Lucy talking to someone on the mobile phone that she supposedly doesn't have!
She arranges
to meet the person later on at the Martello tower. Aha. So, Lucy *is* following
you.
Now you can go use your camcorder on the Saxton Skeleton, and also obtain a photo of
the
Saxton Skeleton. The exhibit cases here require a key, which I never found. You can
also
get a photo of the battle helm. I think we're done on this floor, so take the
lift to
the second floor... but as the lift approaches the second floor, a ghostly hand reaches
out
and sends you back to the first floor! Hmm. We must find out why Verity doesn't want
you to
go up there. So go back to the washroom, and use the camcorder on the mirror to summons
Verity
again. This time, she speaks. And it appears that William Ager, or his ghost, is after
you.
She fears for your safety.
After the conversation ends, exit the washroom and head for the monitor room once more.
Now
you can see what must be William's ghost in several of the monitor views. Yikes! But
now that
Verity has had her little chat with you, you can take the lift to the second floor.
When you use the camcorder on the Tree of Crows painting... well, I shan't ruin the surprise
;-) Then use the camera on the painting to get a photo of an Anglo-Saxon symbol. Nigel
then decides it's time to leave the museum. He gets in a huff with Lucy because she's still
not a 'believer' after all that, and storms off back to the cottage.
Upon entering, Nigel hears a noise. Further
investigation
reveals that some more entries have been made in Molina's diary! Hmm. Doctor
Black, our painter
on the beach, gets a mention. Funny, he didn't look old enough to have
been a doctor... what,
55-odd years ago? Anyway, sounds like Christina's days were numbered
at that point. Now head
upstairs and deposit your latest evidence on the table. Then go back
downstairs, and someone
is knocking at the door. It's Lucy. After she agrees to help you,
you can now access the monitoring
equipment on the sitting room table.
Lucy goes to
place the cameras, while you operate
the equipment. First, log into the Environmeter by clicking
on the red and green flashing box
on the initial screen, then click the little green box
on the monitor for camera #1. Now...
you have to keep helping Lucy to adjust the transmitter
for each camera so that the scene comes
into focus. It seems a bit arduous at first, but
really all you need do is find the right spot
inside the 3 x 3 grid to get the soft focus
right, and then the right spot inside the next
3 x 3 grid for the finer focus.
Once you have all four cameras set up correctly... then you have to carefully watch each
camera
until the energy bars for that camera start to peek, especially the right-hand (blue)
bar.
Depending on how high the energy levels are on the bars next to each scene when you
click,
you can view all of the paranormal events detailed below. But if you just want the
'minimalist'
solution that progresses the game, then all you have to do is the following:
- Highlight the 6 items detailed below that have changed in the Bedroom (Camera
#2)
- Successfully identify/select all of the orbs that emerge in the Hall/Kitchen (Camera
#3)
- Capture at least 3 of the Bathroom events (Camera #1)
- Then Lucy will appear on
the
Balcony (Camera #4). Have Nigel ask all the questions. Done ;-)
Bathroom (Camera #1):
- Laughter
- Figure in the bathtub
- Green orbs
- A figure above the
bathtub
faucet
- Mirror glows white
Bedroom (Camera #2): you are asked to highlight 6 items that have changed in the last few
moments.
These are:
- Stag's antlers
- Plaque under the stag's head
- Two shapes on the
wall
above the bed
- A drawer has opened
- Some money on the table has moved
Hall/kitchen (Camera #3):
- Orbs. You have to highlight them all as they come into focus, then a ghostly
figure appears. For 'bonus points' though, you can also observe the following:
- The clothes
dummy from the bathroom
- Green orbs
- A figure walking towards the blocked up doorway
- A wheelchair falling over in the hallway
- A wheelchair in the kitchen
Balcony (Camera #4):
- A sound (possibly of a noose tightening? Or the boats outside?)
- A
figure
walks by the skylight
- Bats (or birds?) flying around
- Green orbs
Once you've triggered all the necessary events, in any order, Nigel and Lucy go have a
chat
outside. She's still not convinced that any paranormal events have occurred, but agrees
to
meet up with you tomorrow nonetheless. Nigel heads upstairs then. Firstly, deposit all
your
equipment on the window sill. Then you can bring an end to Night Two by accessing the
bed.
Day Three
Go to the window sill to collect your gadgets,
and
it looks like the dictaphone and EMF meter are missing. But the camera has captured a
photo
of a wardrobe ghost. Go downstairs, and Nigel finds more items that have been
stuffed through
the mail slot. The first is a copy of the Saxton Times, detailing your exploits
at the museum
last night. The other item is another threatening letter. This one says "Too
late 4 Gurney,
Travers, and Danvers. Known to some, with some being few, the Nightmare Room
is waiting for
you." Charming. As you try to leave the cottage, Nigel says we must find the
missing gadgets
first. The EMF meter is in the bathtub. The dictaphone is in a drawer in
the kitchen.
Nanny Noah is standing on the pier near the cottage as you exit. She says she saw Lucy
heading
for the coast path. Strange. How would she know that information is important to
you? Anyway,
following Lucy is one of our prime objectives for the day, so might as well
go with the flow.
So head for the coast path then.
Pop into the Celtic Corner on the way. A few things to do in there. As you enter, Nigel
goes
to speak with Rhys, who's quite upset. Seems like the catnappers have taken his Mr.
Tibbs.
You promise to keep an eye peeled. Then pop your latest (publishable) photo, of the
battle
helmet, into the competition box, and access the catalogue of Anglo-Saxon symbols
on the bookshelf.
Use the photo of the Tree of Crows on the book, and you discover that this
photo has the symbol
for town/village running through it.
Head as far as you can go on the coast path now. No sign of Lucy, but if you go as far
as you
can, you can take a photo of pink flowers (that Nigel can't identify). Now
go to the
museum, and talk to the curator. Another (perhaps) useful titbit of information
comes your
way. It seems the Carrion Woods have abandoned mines in them. Then enter the museum
and...
Lucy isn't in there either. Then why was Nanny Noah telling me that she was on the
coast path?
So I suppose we ought to head for the fens next, to see if Lucy is going to keep
her appointment
with whoever.
On the way there, you can stop into Saxton Station and pick up a map of Saxton and local
area. Then head for the fens. You spot Lucy and the person she had a rendezvous with
atop
the Martello tower. You can walk around to the other side of the tower and then examine
it
to eavesdrop... a bit. You can only see the eyes of the other person, but from that and
the
view you had earlier from behind, it looks like our old friend Alex Spitmoor. Well, you
already
knew he was following you. You can only hear Lucy's side of the conversation, and
she's saying
stuff like: "It's not him.", from which you take it to mean that you're not
exactly who Spitmoor
thinks you are. The conversation ends quickly, and you can hear the
footsteps of the two of
them descending the tower. But there's no trace of anyone when you
head back to the other side.
So just head back for town then.
You meet Nanny Noah, who is feeding the ducks at the top of the steps up from the beach.
Speak
to her on all topics, then ask her to identify the photo of pink flowers that you took
earlier.
She says they are Pasque Flowers, very rare, only bloom around May Day. However,
there's
no such thing as a free lunch, and in return for Nanny Noah's assistance, you have
to return
the favour by acting as a guinea pig for the treasure hunt she is planning. She
hands you the
first of 5 clues. After you exit the conversation, you can have a read of the
clue:
"CLUE ONE
Clackety, clackety, clackety clack. Rolling, rolling, down the track. Seek
the
Staff of ages past."
Well, I think that would be the staff photo down at Saxton Station. So head there, and
you
find the next clue behind that photo:
"CLUE TWO
Through the backstreet, to an old town hall. The clerks have gone, leaving
poor
little flutter-by's, who flutter no more."
And that would be the butterfly exhibit in the museum. As you take the third clue from
the
butterfly exhibit (you also acquire a coiled piece of wire), Nigel notes that
the EMF
activity coming from Spivey's cope is off the scale. We need to find a way to circumvent
the
surveillance cameras so we can 'borrow' that scope! Use the coiled piece of wire on the
surveillance
camera that is trained on Spivey's scope. Then use the camera on the wall next
to the scope.
Nigel walks under the surveillance camera and snaps a photo of Spivey's
scope from there.
Now use the photo on the wire to fake out the camera, and you can take
Spivey's scope.
But when you examine it in inventory, it's jammed. Looks like another
trip to avail of Bob
Tawny's repair talents is in order. So head there and leave the scope
with Tawny. It'll be
ready sometime in the afternoon. Well, might as well have a look at
the third treasure hunt
clue now:
"CLUE THREE
Up the hill, and out of sight, you'll find our savior shining bright. Beware
the false torch, from centuries past and seek Saxton's true light to save your soul."
Hmm. The lighthouse? Yep. And Lucy is there. She hands you a walkie-talkie, and
tells
you to, like, keep in touch.
Important note concerning the walkie-talkie: there is a section coming up in a while
where,
if you haven't patched the game to version 1.1, when you try to use the walkie-talkie
you will
be thrown back to an earlier scene, losing some of your progress. You can apply
the patch at
any time, as it's only a data file and doesn't affect your saved games or anything.
So if you
haven't done so already, go apply the patch now according to the instructions supplied
in the
Tips and conventions section at the start of this guide. You have been warned!
Anyway... the fourth clue is indeed here too:
"CLUE FOUR
The old folk of legend need no circles. Ssssss. Sssssss. This majestic creature
has no venom."
This was a tricky one. At first I thought the clue must be referring to a dragon. But it
turns
out to be the *statue* (a statue has no venom!) of a snake in the Celtic Corner. The
last clue
is pretty easy, though there's a bit of a surprise in store concerning the execution:
"CLUE FIVE
Deep, deep, deep into the darkness. These rocky walls hide Saxton's secrets.
Some hear her song, some hear the drip, drip, drip of ancient waters, while others will hear
nothing at all."
So... head for the caverns on the beach. As you enter, CLUE 6 blows into the caverns ahead
of you. Just work your way to the back, and take the left fork to enter the tidal chamber.
You get the same dialogue with the spirit as before, only this time you need to get a close-up
of a rock on the bottom left of the screen. Use the photo of the Pasque Flowers on this rock,
and you succeed in freeing the spirit in the tidal chamber (the spirit says that Ager promised
her these flowers). Then use your camera to take a photo of the tidal pool symbol
that
appears, and of course we'll have to look it up later.
Now exit the caverns. And at the entrance you find CLUE 6 lodged in a rock:
"CONGRATULATIONS & WELL PLAYED
You have completed the May Day TREASURE HUNT. Take this
clue to Nanny Noah's stall to receive your Fayre Tokens. No Tokens for you my boy. You are
only testing my treasure hunt, after all. Pop by The Ark, later this afternoon. I have something
to show you. NN"
As you leave the caverns, Nigel spots Hardacre heading off somewhere. So follow him. Now
you
can finally access some places beyond the tidal cave (before this, it was always "Sharp
rocks",
and you couldn't go there). Take the path to the southwest, and you come up behind
Hardacre
as he's peering through a surveyor's instrument (theodolite). Speak to him, and
from this conversation
you get the idea that you need to find a crank handle somewhere to
operate a bell. So wander
around until you find the bell, then go past that and look for
a pile of ropes (during your
wanders, you may find a picture, in a box of stinky fish, that
someone has taken of Nigel from
behind. Don't know if this is important or not). Anyway...
access this pile of ropes that you
found several times until you have uncovered the crank
handle, and can put it in your
inventory. Use it on the bell to operate it. Go back to
the cove where the rocks echo, and
Nigel gets a vision of the battle helm. Can't make out
what the voice in the vision is saying
though.
When Hardacre hears the bell, he leaves the thedolite to investigate. This is your chance
to
sneak back to the theodolite and have a look through it. You can rotate it using the numbers
at the bottom. In the +135 view, you spot Lucy up by the old net hut. Just then, Hardacre
returns.
As Nigel leaves the scene, Lucy contacts you on the walkie-talkie. Just access your
walkie-talkie
in inventory to speak with her. Nigel then walks up to the net hut.
Lucy wants to get inside the hut, but there's
no door
handle. So go down the steps and have a look around. You can't find anything useful.
Then go
back up to the top of the stairs, and examine the cliff. You find the blood on a
rock that
Lucy spotted earlier. Then speak to Lucy again, and give her your camcorder. When
you go back
downstairs, you can hear Lucy breaking in up above. Then the shutter mysteriously
closes over
the window, and we're in the dark. Tell Lucy to open the LCD cover on the camcorder
to operate
it. Now she can see you, and can guide you through the junk. Have Lucy manoeuver
Nigel around
the obstacles, and then... one of those nasty wraiths materialises in front
of him. So now
guide him back to where he originally was, and the wraith moves there to block
his path again.
Head back the other way, and the wraith disappears... temporarily, but then
heads for Lucy
on the balcony. Have Lucy run to the other side of the balcony. Now guide
Nigel around the
boat (you have to go under the balcony), and towards the northwest corner
of the basement.
The wraith follows him. But near the northwest corner you can examine the
scene more closely.
There you will find a handle that reopens the window shutter, and the
wraith finally disappears.
Examine the barrel with the oil cans on top, and you find the
collar of Mr. Tibbs, Rhys' missing
cat!
Now Nigel can head down the ramp in front of him, and undo the latch on the door. It swings
ominously open. Enter, and... oh dear! The missing cats are hanging there, having been skinned.
There are photos of Nigel and Lucy on the wall. Behind the photo on the top left, you find
a small red key. Then advance to the left. There's that nasty portrait of the Ager
brothers
on the wall above the desk there. The bookshelf contains some grisly anatomy books.
The remains
of a cat are on the desk. Examine the drawers on the left of the desk, then use
the small red
key to open the middle one. You see a bloody scythe atop two books. Just then,
something locks
the door behind Nigel, and Nigel is beset upon by a swarm of flies and panics.
Walk back to
the door, and Nigel calls out to Lucy. Use the walkie-talkie then to tell Lucy
to open the
door. She kicks it in. Now you can investigate further at your leisure.
When you go back to look at the drawer, the scythe is no longer there. Hmm. Reading the
two
journals there seems to imply that one of the Ager brothers is still alive! But how can
that
be? Or is it someone else carrying on their work? When you look at the portrait again,
it has
changed. Two of the figures now have cracked faces. And now on the bookshelf... you
find Frederick
Ager's Journal. Seems as if he's set himself the task of guarding
the remaining Lost
Crown. Now return to Lucy, and speak with her. You have two new topics:
the journal, and the
fact that the painting has changed. You and Lucy finally conclude that
this is a matter for
the police. You speak to her outside then, and discover that Alex Spitmoor
(an anagram of Impostor)
is actually Lucy's brother, and is a police detective investigating
the missing cats. Lucy
then packs you off to Nanny Noah's, while she goes to inform Alex
of the latest developments.
Speak to Rose (remember, that's Nanny Noah's
real
name) on all topics. She presents you with a May Day raffle ticket for having
completed
her treasure hunt. You tell her you've exorcised the ghost of Emily Travers, and
that you suspect
William Ager may have actually killed her (most assumed she had drowned
in the caverns). Rose
then reads your tea leaves, and you emerge from her cottage at night.
So return to harbour
cottage now. You find Bob up on a ladder along the way, putting up loudspeakers
for tomorrow.
Your telescope isn't ready yet. Tomorrow as well. When you return to the cottage,
Nigel heads
straight upstairs. You can go to bed now, only to wake up a few hours later to
the sound of
a ringing telephone...
Night Three
Go downstairs and pick up the phone. Pretty
creepy,
but once again I couldn't understand what the voice was saying for the most part.
After the
'call' finishes, Nigel notes that the Environmeter is detecting activity. So access
it, and
as before try to wait until the meters in each scene peak before clicking on the
corresponding
camera view. You should be able to get the following, but you only need to
complete areas #1
and #4, then you can exit:
Bathroom (Camera #1):
- Figure above the bathtub faucet
- Orb activity. Pick out at least four
or five orbs, and you see a figure bending over the sink
Bedroom (Camera #2):
- Someone walking through the bedroom
- Looks like Christina in your
bed
- Wheelchair toppling over by the bed
- Drawers open
- Wheelchair by the closet
and the
bed
Hall/kitchen (Camera #3):
- Wheelchair toppling over in the hall
- Man walking down the hall
- Wheelchair
in the kitchen, sobbing
- Clothes dummy in the hall
Balcony (Camera #4):
- You have to form a sentence with the words from different areas of the
screen.
This one pissed me off quite a bit :- It sounds like when you click on the middle
of the scene
it says "we". So I was looking to form something like: "We (are the) evil which
(lives in)
the walls." But it turns out that what sounds like "we" is actually meant to be
"within"?!
Pretty lame. So you have to trace out: "Evil which lives within the walls." I'll
leave it to
you to figure out which part of the screen to hit in which order. Mightily peeved
I was after
trying this at least two dozen times before I figured out what the problem was!
One you've got definite paranormal activity in areas #1 and #4, you can quit the Environmeter.
Then walk down towards the end of the hall, and Lucy contacts you on the walkie-talkie. Respond
by activating your walkie-talkie, and the two of you meet up outside. Lucy agrees to help
you
further by coming inside and manning the Environmeter. Then you can go walkabouts...
Go to the end of the hall first. From Lucy's viewpoint, you see a wraith in the kitchen,
then
a figure appears briefly behind Nigel. To the bathroom next. You hear Christina crying,
and
a spectral form appears. Now to the bedroom. The closet doors open, and the drawers open
and
close. Finally, head out to the balcony. You get a good image of Molina hanging himself.
Lucy
asks Nigel to capture it on film, but Nigel says he has a better idea... you can get
a voice
recording of Molina now. When you play it back, you hear the numbers: 3...
4... 1...
8. Yourself and Lucy decide to sleep on it.
You can go deposit the latest evidence on the table, then your Hadden Industries gadgets
on
the window sill, then hit the sack. You dream the scythe/picture of the Ager brothers
dream,
only this time Nigel takes the place of one of the Ager brothers in the picture. Then
you wake
abruptly, and Nigel says there is something wrong... with time. Indeed things are
looking a
bit... foggy.
Have a look out the bedroom window, and you see... nothing. Then head downstairs, and towards
the end of the hall. When you examine the wall there, you are brought back to reality...
I
think ;-)
Day Four: May Day
Go collect your gadgets from the window
sill,
and once again only the camcorder and camera are there. And once again, your camera
has captured
an image during the night. This time, it's a photo of three of the Ager brothers
around
your bed. There's another threatening letter downstairs. This one reads: "The
rocks are
waiting to prick at your head, Danvers poor Danvers is already dead." The Saxton
Times is there
as well, and tells the grisly story of the cats found at the old net hut.
This time, your dictaphone
is on the shelf in the bathroom, and the EVP meter is... oh, but
wait! The doorway at the end
of the hall is now bashed clean through the wall :- So enter,
as you must...
The water is stagnant and still. If you look down at the arch in the southwest corner,
you
see that it has been walled up. You can turn on the light using the panel on the wall,
then
examine the safe in the corner. How much are you willing to bet that the combination
3-4-1-8
opens it? It does, once you hit the windmill image after using the combination! Inside,
you
find the missing EVP meter, and... Molina's last diary entry before his suicide. It was
apparently
this stagnant water that eventually killed poor Christina. On the door of the
safe is a picture
of Christina. Use your camcorder on it to reveal the image of another Anglo-Saxon
symbol, then
the camera to obtain a photo of the symbol from Christina's portrait.
Now you can head
outside for the May Day festivities ;-)
Actually, let's head straight for the Celtic Corner first, and access the catalogue of
Anglo-Saxon
symbols on Rhys' bookshelf. The symbol we got from the cavern's tidal pool is
the symbol
of an eye. The one we just got from Christina's portrait is the symbol
of the Great
Fen. Hmm. Might as well speak to Rhys while you're there, but you don't
learn anything
useful (and that probably doesn't surprise you at this stage in the proceedings).
Anyway, now
you can head down to the beach and enjoy the fayre...
You can start off by speaking to Bob Tawny,
who
has set up camp at the base of the stairs. If you noted earlier that poor Cairin the
pig had
disappeared from his stall, now you know what became of him :- Head to the left
and speak
to Lucy next. You agree to meet her later on in The Bear, when the results of the
Saxton Snappers
competition will be announced.
Keep heading left and go in to see 'Mystic Morgan'. You suspect it might be The Bear's
landlady,
but no way to be sure. You can't do anything here yet though, as she expects payment
up front
for her services.
Keep working your way left, and speak to Nanny Noah, then Professor Oogle. From Oogle,
you
learn that the first prize for the raffle is a work of art. And you also suspect that
Oogle
suspects that you may be the one who nicked Spivey's scope ;-) And well, that's about
it for
the chatter. We'll need to find some silver for Mystic Morgan in order to progress
things further.
As it turns out... if you rummage around long enough in the 'un-Lucky Dip
Barrel', you'll come
away with an old silver spoon. Use this item on Mystic Morgan
to begin your reading.
Morgan seems to be trying to discourage you from finding the Lost
Crown. And that's about all
you learn. But when you exit the trailer, you found that your
raffle ticket is the one that
has been drawn. So speak to Oogle again and... well now, you've
won a painting of Saxton's
lighthouse. How exciting! Not :-
Now go speak to Bob Tawny once more, and you receive a repaired Spivey's scope. So let's
see
if we can put it to some use, shall we? Head for the lighthouse. If you use the scope
on the
right-hand side of the screen, you just see the harbour, but if you instead look to
the left...
you finally discover Ulcombe Church! Now you can continue along the coast path
and head there
;-)
You can try getting into the church tower,
but
the wooden door is locked. So continue on to the west, and you come to an archway. There
is
a door here that you can enter. Once inside, head to the southwest, and you come upon
a young
girl named Nancy. As you speak to her, Nigel begins to suspect that he is speaking
to a ghost.
This suspicion is confirmed when you learn that she is waiting for her father
to return from
the war - World War II, that is! Anyway... she's playing hide and seek with
her brother Timmy.
If you can solve a riddle on a slab out in the graveyard for Timmy, he'll
tell you where the
key to unlock the church tower is located.
You might as well explore the church a bit further. You find a pipe organ, and up that
aisle
you can examine the ends of some pews, and get a photo of a carved seahorse.
Under the
pews there is a loaded mousetrap, but you can't do anything with it at the moment.
Exit the church, and head through the other archway around to the back of the church. Examine
the wooden shed there, and you find Timmy, but you're not getting anything out of him just
yet. Then when you head back around the corner, there's Mr. Russet on a ladder! Not worth
speaking
to him yet, until we've located that stone slab with the riddle on it. This turns
out to be
set into a wall along the pathway, just to the left of the first archway. But oh
dear, the
riddle appears to be written in Anglo-Saxon. So speak with Russet again, and he
fortunately
knows Anglo-Saxon. He asks you to read the riddle to him. So... go use your notepad
on the
riddle to get a transcription of the riddle. Then speak to Russet once more,
and you
can read him the lines one at a time:
"Deos lyft byred lytle wihte."
Translation: "The wind carries small creatures."
"Ofer beorghleoa pa sind blace swipe."
Translation: "Over hill-slopes and headlands:
dark."
"Swearte salopade. Sanges rope."
Translation: "Coated, black-bodied. Bursting with
song."
"Heapum ferad, hlude cimad."
Translation: "They chirm and clamor like a troop on wing."
"Tredad bearonaessas, hwilum burgsalo."
Translation: "Winding their way to wooded cliff-walls."
"Nippa bearna. Nemnad hy sylfe."
Translation: "Sometimes to the halls of men-singing
a
name-song."
Well, now at least you have a translated riddle. Go speak to Timmy again. You read
him
the first part of the riddle, then use the translated riddle on him, and he reads the
second
part to you. Together you work it out. It's referring to the birds that nest in the
church
tower. Answer him correctly that they are sparrows, and you've got yourself one key
to the
Ulcombe Tower. So let's go there then!
There's a machine straight ahead of you as you
enter.
Upon examination, looks like it needs some fuel in order to function. Head down the
ramp into
the basement of the tower, and pick up the rusted metal valve at the base
of the ramp.
Have a look at the locked door while you're there. Hmm. Requires a combination.
Also note the
pipe that runs into the top of the door.
Go back and speak to Russet again, and you have some new topics. As you probably already
figured
out, the machine in the tower is a steam engine, used to provide power to the place
(as there
is no electricity supply out here). And the door in the basement of the tower leads
to a crypt.
Both the pipe organ and the crypt door need a supply of steam to operate. Go
speak to Nancy
again. Hmm. If you could show her a letter from her father, that would release
herself and
Timmy from this place. Now take the ladder up to the top of the church tower.
Use Spivey's
scope on the memorial cross, and you see someone standing at the base of it.
Go down there,
and now you can read what's on the memorial. Use your notepad on it to obtain
a letter to
Nancy and Timmy from their father. Now when go back into the church, Nancy
is gone. Turn
the crank on her gramophone, then use the dictaphone to get a ghostly recording
of an organ
tune. Now head to the shed where Timmy is hiding, and Nancy is standing there.
Use the
letter to Nancy and Timmy on her. She reads it to Timmy, and then they both disappear
in a
flash of blinding light. You can get into the shed now ;-)
There you discover another crown book (turns out to be Nathaniel Ager's Journal),
and a can of oil, half full. Use the can of oil on the machine in the tower, then
push
the top button to start it up, and now you have a power source for the pipe organ and
the crypt
door!
Go to the basement and examine the crypt door. Most of the buttons make a dull clunk when
you
hit them, except for the one on the top right, which clicks. So hit the one on the top
right
again, and then find the next one after that that clicks rather than clunks. It's the
one on
the bottom left. The sequence that opens the crypt door is: top right, bottom left,
middle,
bottom right, top left. Now you can enter the crypt...
Dark in here, so another camcorder job. Head straight first, go to the right around a corner,
and then through some bars on the left you can retrieve a piece of broken candle stand.
In the next corner you find a wooden coffin that can be prised open with the candle stand.
The skeleton there holds a grisly verse that provides clues to a puzzle you are about to
encounter.
The first part of each verse is significant:
- "The waning crescent moon did light,
the frightful face of death that night..."
- "The moon appeared as sharpened scythe,
the air chilled as death arrived,
the
startled
hermit tried to hide..." - "The Darkling Moon shrouded this land,
as the peasant
crossed
the fenland sand..."
Moving on a bit, you come to the aforementioned puzzle on the left-hand wall. You have
to turn
the panels to correspond to the verses you just read, thus:
Concentrate on getting the left and right-hand panels in the correct positions, as above.
Then
when you rotate the middle one to the position shown, the panels in the wall behind
you will
open ;-) You can enter this secret room, but a wraith blocks your access to the
tomb within.
Hmm. We'll need to find a way to get rid of that!
So return to the church, then take the passageway behind the pipe organ. Get a close-up
of
the pipe there, use the rusted metal valve on it, and now we are ready to play a tune,
but
what to play? Well, I'm afraid it's that ghostly recording of an organ tune we made earlier:-
Up the aisle a ways from where Nancy was sitting there's a book on a table. Looks like the
first note we need to play is F#. So... memorise where it is on the keyboard, then
back
to the organ and... come on, this is a piece of cake! What? You mean you *haven't* had
20 years
of musical training? Well, there is a clue if you remember to look in Nathaniel
Ager's journal:
Starting from the top of the illustration, there are two notes missing in the sequence,
represented
by ??? below:
F#, A, ???, B, A#, ???, D
Listen to that ghostly recording you made earlier in order to figure out the two missing
notes.
Don't worry, it even took me a while to get this right, and I'm not short of a musical
ear,
let's say. Refer to the book on the table again if you need further assistance with
the music
theory. Oh alright then, this is the order you hit the keys in:
F#, A, G, B, A#, C, D
Once you play the correct combination of keys, you have succeeded in freeing Ulcombe Church
of its dead! Now return to the crypt, and you can visit the tomb of Nathaniel Ager. You come
away with a photo of the symbol above Nathaniel Ager's tomb. Now exit the crypt. On
the way out, Russet bids you farewell from above. And then after leaving the tower... you
come
upon Rhys' cat, Mr. Tibbs! Now we need to find a way to make him follow you home. Hey
wait...
go use the candle stand on the baited mousetrap under the pews in the central aisle
of the
church. You obtain a wedge of Stilton Cheese. Use this on Mr. Tibbs to get
him to follow
you. Every time he stops, just use the cheese again to entice him further.
Finally, you both
end up in the Celtic corner for a cheerful reunion. While you're there,
might as well pop that
last photo into the competition box, and look up the latest Anglo-Saxon
symbol. It turns out
to be the symbol for a hill. If you now go back to the fayre,
absolutely nothing
has changed since last time, so might as well head for the cottage. Go
up to the bedroom and
examine the table. Access the Saxton local map. Then place the four
photos of the Anglo-Saxton
symbols onto the map. Hmm. As you already know, the symbols mean
slightly different things
depending on how they are rotated. We don't have many clues to
go by at this point, but let's
see... my gut feeling is that if a hill is involved at all,
the treasure must be *beneath*
it. So rotate the hill symbol twice to start with. Then to
go anywhere at all here beyond the
town, you need to go *through* that cave, the Fenland
Eye. So rotate the eye symbol twice as
well. And in order to get to the Carrion Hill, we
need to go through the fens, so rotate the
Great Fens symbol three times. Then all you need
do is play with the town symbol until you
find the right position. I thought it would be
'beyond' (no rotation), but it turns out you
need to rotate this one three times as well,
to the 'beneath' position. Once you have all four
symbols placed correctly, Nigel recites
the path to the Lost Crown for you:
"Beneath the town... through the Eye... beyond (through) the fens... beneath the hill."
And so we're off to Carrion Wood once more to seek our fortune... on the beach, note that
the
stalls that once blocked our path to the Fenland Eye have conveniently disappeared ;-)
Now at the second monolith, you can head south
on
a path that brings you down into an old mine. Examine the barrels inside the cave entrance,
and you find a metal plunger there amongst the cobwebs. Now head to the east, and
take
some sweaty gelignite from the box under the makeshift table. Examine one of
the scrolls
there (all four read exactly the same), and it tells of a 'final rock wall' somewhere
in the
mine, that the men were afraid to blast through due to 'knockers'. Hmm. Well the 'knockers'
aren't going to stop us, are they?
Enter the mine proper next, and you come upon this rock wall, immediately to your left.
Place
the gelignite on the rocks by the wire, then go back to the table and use the metal
plunger
on the device there and... kablooie! No more rock wall. Head back inside, and through
the freshly
opened hole in the wall. You find the journal of one Alistair Farleigh
there. You can't
take it, but be sure to read it. It's important information... hmm. Seems
like whatever malevolent
presence is guarding the mine eventually got the better of him.
We'll have to be careful. Continue
forward and you come to a chasm with a rope bridge over
it. Ominously, the torches in this
area all come alight as you approach. Creepy.
Examine the mural on the wall there, and Nigel walks onto the bridge to get a closer look.
You can get a recording of whistling, tonal wind noises here. Then you can continue
across the bridge.
On the other side of the bridge there's a hallway which leads to another bridge. Cross
this
bridge, and hang a left. You can see a water wheel here, and a trough leading to it.
But there's
a hole in the trough. If we could plug the hole, then the water supply would
make it to the
wheel. Leave this area and go to the area across from it. There's a button
here set into the
wall with a 'V' symbol on it. Pressing the button has no effect, but I'm
betting if the water
wheel is turning we'll have power, and things will be different then!
Nothing more we can do
here for the moment, so let's go find something to plug the hole in
the trough with. Sure enough,
out in the middle of the woods, at the base of a tree, you
find a sticky pine cone,
oozing resin. Plug the hole in the trough with this object,
and now we have power ;-) Pressing
the button with the 'V' on it now opens a doorway there...
Head through this doorway, noting the inverted 'V' button on the wall to the left. When
you
press this button, the doorway closes. Hmm. Anyway, press the button once more to open
it again,
and continue onwards. You come to an area with another water wheel. There's a stone
set into
the wall here, with the Anglo-Saxon symbol that represents the four seasons carved
into it.
Interesting. Now take a step forward, and examine the water wheel. You see another
stone carving
through the spokes, the symbol for spring with a fish above it, like this:
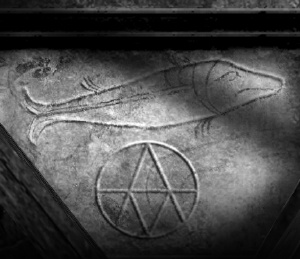 |
Continue past the water wheel, around a corner, and examine the floor there to the right.
Among
some bones, you find a mysterious disk. From there, head left past the large
clockwork
mechanism, and into another room. Examine the stones to the left just inside the
doorway there,
and you find a second mysterious disk. Head into this room, across
another bridge, and
into a dining hall. There are some tapestries on the walls here, one
of them sporting the three
crowns, and a large stone object that looks something like a kiln...
but isn't. Refer to the
recording of whistling, tonal wind noises you got from the rope bridge
mural earlier on. The
sounds of the 'kiln' match the sounds of that recording once the pieces
are rotated to the
following position:
And now we have our third mysterious disk. Then head back to the hallway again,
and
this time go to the right at the T-junction by the clockwork mechanism.
You enter a large circular room with one of those dratted wraiths oozing up out of the
stones
in the middle of the room. Interesting puzzle this. There are 9 pedestals around the
room.
You must select the scene on each pedestal that represents, in chronological order,
your progress
through the game. You start at the bottom right, with your train coming into
SedgeMarsh Station,
and finish at the top right, which is a scene from just minutes ago.
Going clockwise from the
stone after SedgeMarsh Station, you must arrange the scenes in the
following order:
- Nanny Noah and George on the beach
- Box with Spivey's journal and bottles in
the
caverns
- Nigel by the horse at Ager House
- Northfield Church graveyard
- CCTV
room
in the museum
- Nigel and Hardacre
- Mystic Morgan's trailer
Once you've arranged those correctly, the wraith dissipates. Now you can examine the centre
of the room. Hmm. Looks like we'll need to locate one more of those mysterious disks before
we can proceed further.
Go back to the inverted 'V' button and press it. Now the doorway with the four seasons
symbol
carved on it opens. Head through there, and you come to a room with a large stone
wheel on
the wall. At the top of the wheel are four plaques with the symbol for winter. Then
two with
the spring symbol on the right, four with the autumn symbol on the bottom, and two
with the
summer symbol on the left. I suspect this has something to do with the fish over
spring symbol
we saw earlier. Do we have to have to get the fish aligned with the spring
symbols? Indeed,
you have to rotate both wheels so that they align as in the picture below:
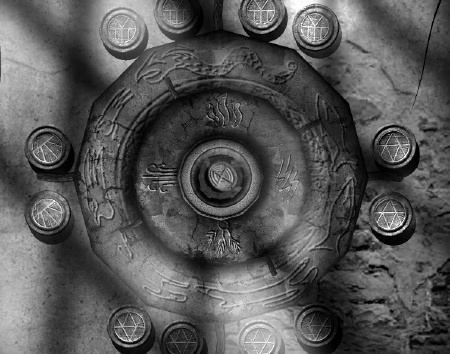 |
Then the centre of the stone wheel opens, allowing you to recover a fourth mysterious
disk.
Time to return to the large circular room and put them to use. The disks will only
go into
the holes in a certain way, so don't worry too much about placing them. Now... at
the outset,
this looks a right mess; a real complicated puzzle that could take you hours
of twiddling to
solve, right? But looks can be deceiving, and it's actually quite simple
if you apply the right
technique. So... the first trick is to replace those complicated symbols
with letters, so that
it's easier to see what's really going down. The second trick revolves
around trying to solve
the puzzle, no matter how futile you find this effort to be. You learn
a very important fact
here: no matter how badly you mess up, the puzzle resets itself after
five moves. From that
we can infer that five moves are all that's necessary to solve the
puzzle.
Please bear with me, almost there. From playing with the pieces, you note that the outer
pieces
always turn counter-clockwise, and the middle piece turns clockwise. And that means...
after
five moves the piece in the middle will have rotated five positions clockwise. So now
we can
draw the puzzle in its simplistic 'by letter' representation, with the middle piece
having
already been rotated to its final position after five moves, thus:
So in order to solve the puzzle, you just have to make the letters in the outer pieces
line
up with the corresponding ones in the centre piece. Thus:
- Rotate the top left piece once so that the two C's will line up
- Rotate the
bottom
left piece twice so that the two B's will line up
- Rotate the bottom right piece
once so
that the two A's will line up
- Rotate the top right piece once so that the two
D's will
line up
And that's it! A column rises to the centre of the floor, and step on it you must to descend
to... Ganwulf's realm ;-)
Once you are at the bottom of the shaft, advance to the west and you come to Ganwulf's
tomb.
Examine it, then wait till a flash of light illuminates The Lost Crown, and
quickly
nick it! After some incomprehensible nattering from Ganwulf, you find yourself topside
once
again. Now make your way out of the mines, and it's quite a simple matter to avoid the
wraiths
(just head to the west from Monolith #2, then to the west again around Monolith #1)
and make
your way back to town...
Once in the cottage, hide the Lost Crown in
the
chest at the base of your bed, then visit The Bear. You win the Saxton Snappers competition
(of course), and wind up speaking to Lucy. Nigel just can't contain his excitement over having
found the crown, and invites Lucy back to the cottage to see it. But the place has been ransacked
and the crown is missing :-
Fortunately, Lucy has nicked Mystic Morgan's crystal ball, and reluctantly you agree employ
it to find the missing crown. Through the crystal ball, you witness what looks like Professor
Hardacre being chased across the rocks and beaten to death with a scythe... and that brings
an end to today's mysterious proceedings.
Day Five
Time to wrap things up. We have to go looking for
Hardacre
and the crown. Once we find it, best return it to Ganwulf. We've learned our lesson,
and no
good can possibly come from trying to hold onto this unlucky artefact :- Meanwhile,
another
newspaper and another threatening note have graced your mail slot:
"Killer, killer they saw what you did. Old Grindle's tail keeps me well hid. EG"
Hmm. The initials EG. Not sure who that could be. Anyway, let's head outside, and see what
we can find. As soon as you exit the cottage, you hear a dog barking. So head for the beach,
and through the Eye. Sure enough, as you approach the Pinnacles, you see the characteristic
police tape denoting a crime scene. Speak to Nanny Noah then... and she refuses to speak
to
you, like she doesn't even know you! Then speak to the constable there, and you get referred
to Lucy's brother, Alex Reubans. Well, it's Hardacre that's been murdered alright. Nothing
you can do but keep out of the way.
Hmm. Professor Oogle refuses to speak to you at the museum, and the same with Bob Tawny.
It's
almost like you never existed, in their eyes. Nothing more we can do, I suppose, than
head
back to the cottage to try to piece things together. When you head up to the bedroom,
you find
that the place has been put back together... in a certain sense. The crown is still
missing
from the chest, and all your photos and tapes have been erased! What's going on?
Well, no one in town will speak to you at the moment. But there is one thing you can do.
Go
to the phone booth and call the Crime Line number. You report that the identity of the
Saxton
Skeleton is... Alistair Farleigh (remember, you found his journal in the old mine).
Then return
to the cottage, and Lucy is sitting out on the pier there. She's inconsolable
as well, but
when you break off the conversation and head into town... there's a whole crew
of police at
The Bear with Alex. Seems they've caught Mr. Gruel red-handed, trying to nab
Morgan's cat.
Nigel speaks with Alex, and he's willing to let you explore the scene of Hardacre's
murder,
as long as you promise to turn up something concrete...
After leaving Alex, you emerge at the Fenland Eye. Head all the way to the east, and beyond
a constable there, you can examine Hardacre's boots, and take a photo of Hardacre's boots.
Then keep walking around, and compare this photo to all the other footprints you find in
the
sand. Eventually... just to the southwest of the old bell, by some lobster pots, you
find one
of Hardacre's footprints. As you pull out of the close-up, Nigel sees Hardacre's
ghost.
It's pointing somewhere to the left of there. If you examine that area, you can pick
up The
Lost Crown (again!) from a pile of old ropes. Nigel then returns to where Lucy
is sitting,
on the pier beside your cottage.
Speak to Lucy, and Nigel suggests that they put an end to all this by holding a séance
at midnight
in the cottage. Lucy agrees. Now go back into the cottage and head for the safe.
Put the crown
into the safe, and as you turn to leave... Christina's ghost blocks your path!
Look down into
the stagnant water by the blocked up archway, and retrieve some of Christina's
diary pages.
Aha. It would seem that our dear Molina was not the kind-hearted soul we
had assumed him to
be. Something sinister was going on, and it has to do with the windmill
carvings at the foot
and top of the stairs, and a space under the bed. Hmm.
As you emerge from that place, you enter another one of these strange time warps. Now let's
try to follow Christina's instructions regarding the windmill carvings. If you look around
the cottage carefully, you will find that there are actually four of these carvings. Here's
the order you must press them in to make something happen:
- Top of the stairs
- Sitting room, on the top left of the doorway leading to
the
hall
- Bottom of the stairs
- Top left of the bathroom door (this one wasn't mentioned
in Christina's diary pages)
Once you press the fourth windmill you hear the sound of a door opening. It turns out to
be
the supposedly blocked up doorway in the kitchen! You find Christina's diary in
the
hidden pantry. After you finish reading it, Nigel tries to free the ghosts of Molina
and Christina...
then Nigel is suddenly back in the present time and you hear knocking. Hey,
it must be Lucy.
Answer the door, and indeed it is. Then Hadden phones, and wants to speak
to Lucy. How strange.
After the call, Lucy mans the Environmeter, and sends you up to the
bedroom to begin the investigation...
Eventually, the ghost (or, more correctly, ghosts in the plural sense) of Hardacre appear
in
the bedroom. Then Nigel follows Hardacre's ghost down to the safe, which is now open with
the
crown hovering in front of it. Examine the safe, and Nigel is transported to Ganwulf's
crypt,
where you come upon the ghostly figures of the entire population of Saxton. Examine
the tomb,
then place the crown back on Ganwulf's skull and... having restored the natural
order of things,
you wind up back with Lucy, standing on the beach. Congratulations! You
have completed The
Lost Crown ;-)
See the metzomagic.com Review of The Lost Crown.
Copyright © Steve Metzler 2008.
All rights reserved.
|